[라즈베리파이] 레트로파이 - 영어 First Installation / ALL ETC | interest 2/라즈베리파이·게임설치사용
멀라머가 2018. 2. 28. 17:44
http://blog.daum.net/choclub/82
<!-- div { color: #939393; } li { color: #939393; } a, a:link, a:hover, a:visited { color: #939393; } td { color: #939393; } .txc-search-border { border-color: #939393; } .me2day_daily_digest p, .me2day_daily_digest a, .me2day_daily_digest a:hover { font: 11px '돋움', dotum, sans-serif; } //-->
First Installation
Jools Wills edited this page 21 days ago · 96 revisions
Clone this wiki locally

Version
| 4.0 |
- Hardware
- Installation
- Controller Configuration
- EmulationStation
- Configure Wifi
- Installing Additional Emulators
- Transferring Roms
Congratulations! You have discovered the wonderful world of RetroPie- your entire childhood is within reach! RetroPie is a combination of multiple projects including RetroArch, EmulationStation, and many others.
This page is for people just getting started on RetroPie. The easiest way to install RetroPie is the SD image which is a ready to go system built upon top of the Raspbian OS - this is the method described in the following guide. Alternatively, advanced users can install RetroPie manually.
This guide will give you the very basics to get you up and running from a blank SD card to first boot into EmulationStation.
If you hate reading then see this video. Otherwise read on!

Hardware Needed:
- Raspberry Pi (A, A+, B, B+, 2, Zero, or 3) - for best performance use a Raspberry Pi 3 Model B
- Raspberry Pi Case (optional but recommended)
- MicroSD Card (see compatible SD card list here)
- MicroSD Card Reader (For installing retropie from your computer)
- HDMI cable or 4 Pole RCA to 3.5mm Cable (HDMI works best)
- Television or Computer Monitor- really any screen with HDMI or RCA ports
- Wifi Dongle or Ethernet Cable (Wifi is built into the Pi 3- see wifi dongle compatible list here)
- 5V 2A Micro USB Power Supply (2.5A for pi 3)
- USB Keyboard and Mouse (to get things set up or you can use SSH)
- USB Game Controller of your choice (or you can get the Control Block to use original SNES controllers)
The simplest way to get most of these components is through a kit such as the Canakit.
Installation
SD Images
There are currently two versions of RetroPie. There is one version for Raspberry Pi 0/1 (Model A, A+, B, B+) and there is a version for Raspberry Pi 2/3.
Download the SD image for your version of Raspberry Pi from the following page:
https://retropie.org.uk/download/
If you are unsure which version of Raspberry Pi you have there is an easy way to check:
Rpi 0/1= 1 raspberry when the pi boots up
Rpi 2/3= 4 raspberries when the pi boots up
If you get the error Illegal Instruction when it boots, you picked the wrong SD image.
Extract
Once you have downloaded your SD card image you need to extract it using a program such as 7-Zip. You will extract the downloaded .gz file and the extracted file will be a .img file.
Install RetroPie Image on SD Card
To install the RetroPie SD image on your MicroSD card. (You may need a MicroSD card reader to plug it into your computer)
- For Windows you can use a program called Win32DiskImager
- For mac you can use Apple Pi Baker
- For Linux you can use dd command or Unetbootin
Note RetroPie is built on top of Raspbian (a linux based OS for the Raspberry Pi) and as such the partition on the SD card is EXT4 (a linux filesystem) which is not visible on windows systems, so the card will show up as a smaller size than usual and you wont be able to see everything on the card, but it is all there. You will be able to access the filesystem over the network as described in the transferring roms section below.
If you're updating from a previous version of retropie see HERE
Configurations
Controller Configurations
On first boot your filesystem will be expanded automatically, you will then be welcomed with the following screen- this menu will configure your controls for both Emulationstation and RetroArch Emulators:
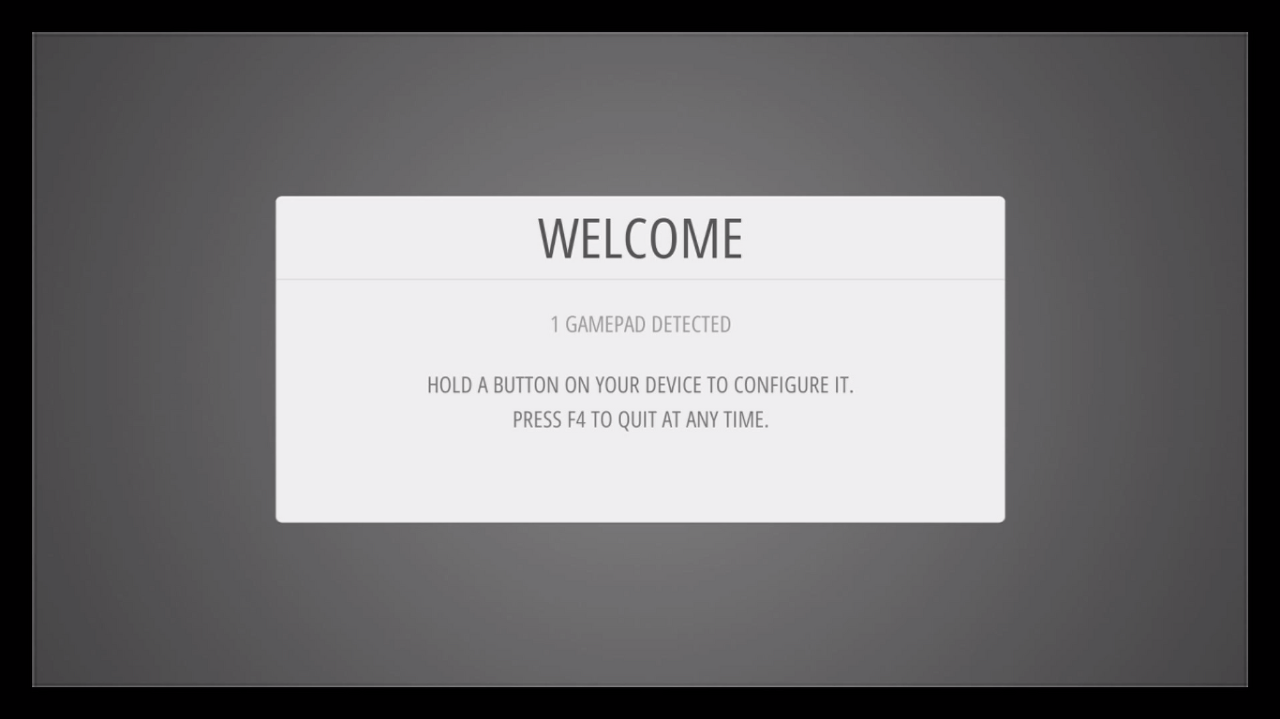
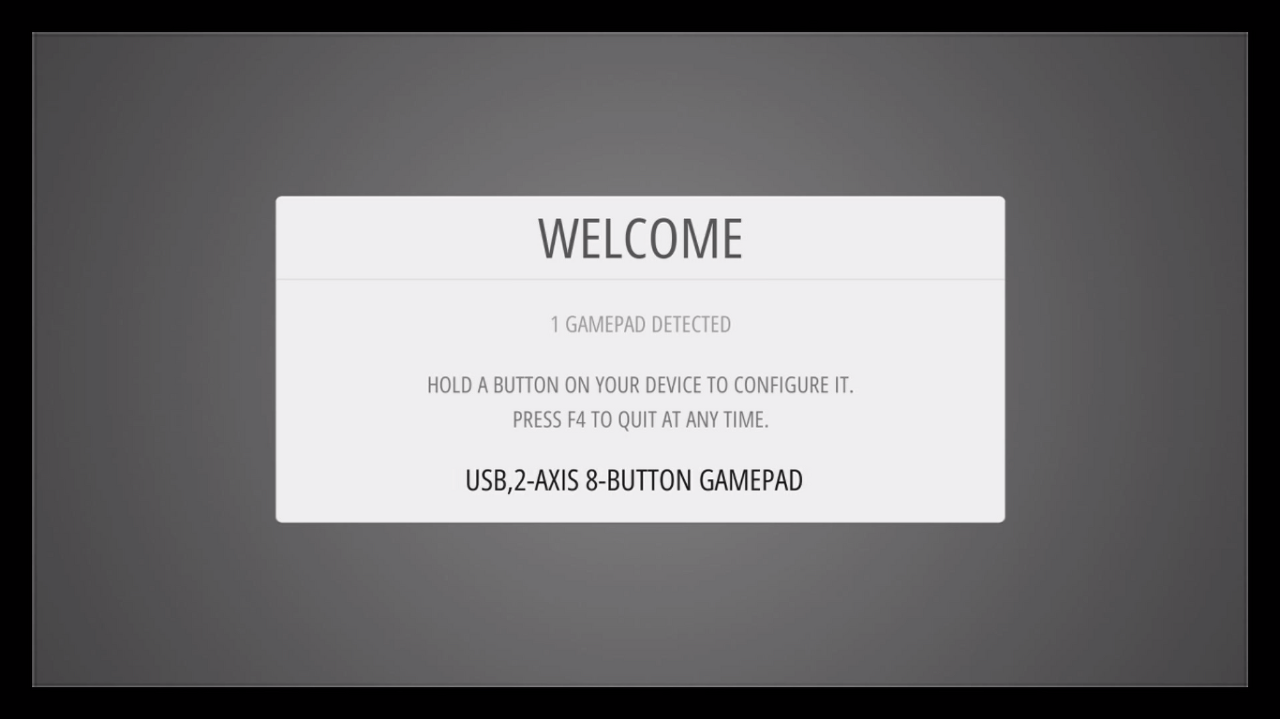
Hold down any button on your keyboard or gamepad and the name will appear at the bottom and then open up into a configuration menu:
Follow the onscreen instructions to configure your gamepad- if you run out of buttons just hold down a button to skip each unused button. When you get to OK press the button you have configured as "A".
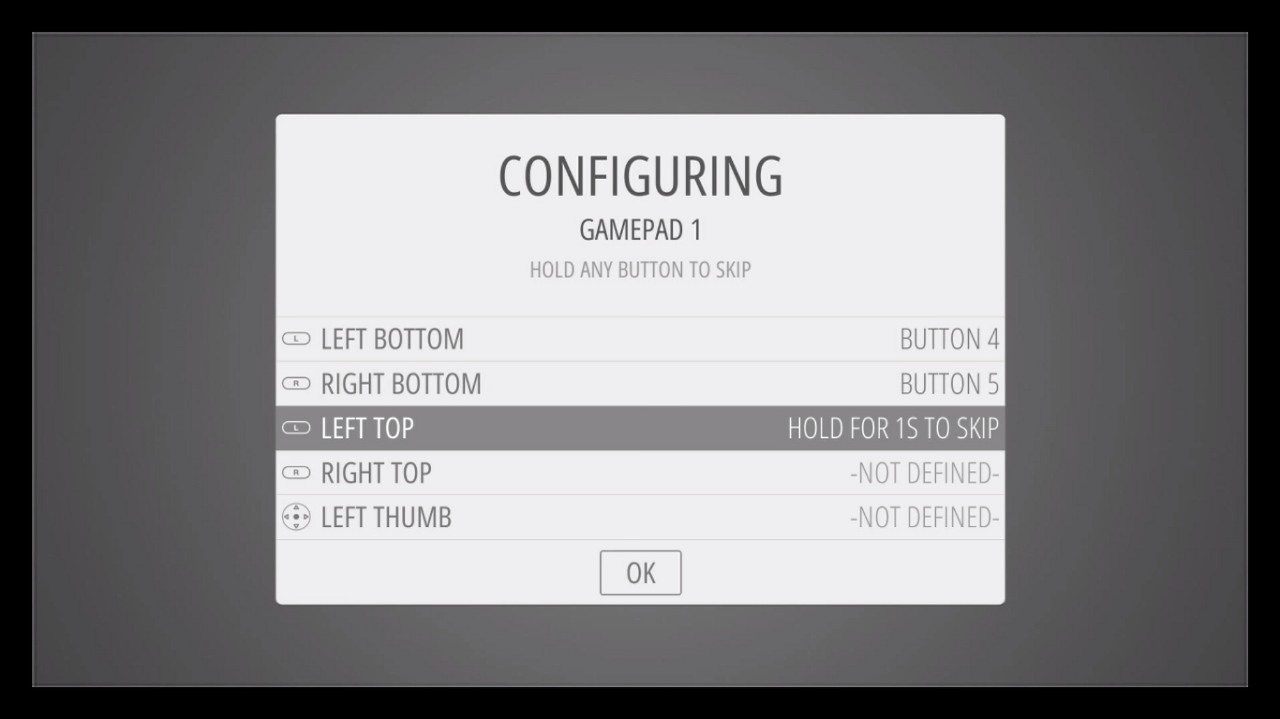
If you wish to configure more than one controller, you can do so from the start menu of emulationstation. For more details on manual controller configurations see this page Here. See also HERE
See the following diagrams for reference:


Default Hotkeys
Hotkeys enable you to press a combination of buttons to access functions such as saving, loading, and exiting emulators. The following chart shows the default hotkey combinations. By default, the hotkey is select so that means you hold down select while pressing another button to execute a command. Note that hotkeys are only specific to the retroarch/libretro based emulators.
HotkeysAction
| Select+Start | Exit |
| Select+Right Shoulder | Save |
| Select+Left Shoulder | Load |
| Select+Right | Input State Slot Increase |
| Select+Left | Input State Slot Decrease |
| Select+X | RGUI Menu |
| Select+B | Reset |
EmulationStation
Where are the systems?
| When you first see EmulationStation you may wonder why you don't see systems like the SNES or Game Boy- worry not- they are installed on the system, roms just need to be added to their respective rom folders before they will become visible. Transferring roms are described in the following steps. |
Configuring Wifi
If you wish to use wifi to transfer roms over the network rather than a USB stick or Ethernet cable you'll need to setup your wifi- which can also be done from the Retropie menu in emulationstation:
It will open into this menu:

Choose your SSID from a list:

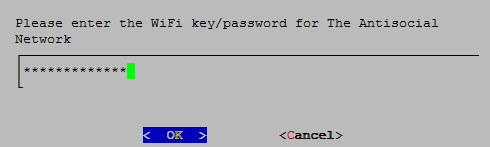
Type your Wifi Password (You may need to wait a bit after you finish for the configurations to save)
After it's done configuring you should see your wifi info in the original menu:

For more WiFi configuration options see this page HERE
Installing additional Emulators / Ports
On RetroPie 4.0, not everything is installed by default. The pre-made image ships with libretro emulators with a few standalone emulators such as mame4all, mupen64plus and pifba. Ports like quake and doom and other software like ScummVM can be installed later.
Software can be installed from the RetroPie-Setup script - which is accessible from the RetroPie menu on EmulationStation. once there you can navigate to "Manage Packages" where you will see various sections. In each section are lists of packages that can be installed (and it will show what is currently installed). Stable additional packages are under the "Optional" section, with more unstable packages listed under experimental. The packages are ordered first by type (emulators / libretro cores / ports), then alphabetically. By selecting a package you can choose to install it, or remove it. Some packages also have additional configurations.
Transferring Roms
Due to the nature/complexity of Copyright/Intellectual Property Rights Law, which differs significantly from Country to Country, ROMs cannot be provided with RetroPie and must be provided by the user. You should only have ROMs of games that you own.
There are three main methods of transferring roms:
USB
- (ensure that your USB is formatted to FAT32 or NTFS)
- first create a folder called retropie on your USB stick
- plug it into the pi and wait for it to finish blinking
- pull the USB out and plug it into a computer
- add the roms to their respective folders (in the retropie/roms folder)
- plug it back into the raspberry pi
- wait for it to finish blinking
- refresh emulationstation by choosing restart emulationstation from the start menu
see this video for reference:

SFTP (needs an active internet connection)
- Wired (needs ethernet cable)
- Wireless (needs wifi dongle) There are many SFTP programs out there, for windows many people use WinSCP for mac you can use something like Cyberduck

Default username: pi
Default Password: raspberry
You can also log in as root if you wish to change more files than just the roms, but you first need to enable the root password which is explained here
Samba-Shares (needs an active internet connection)
- if on windows type \\retropie into the computer folder. You can also replace retropie with your Raspberry Pi's IP address
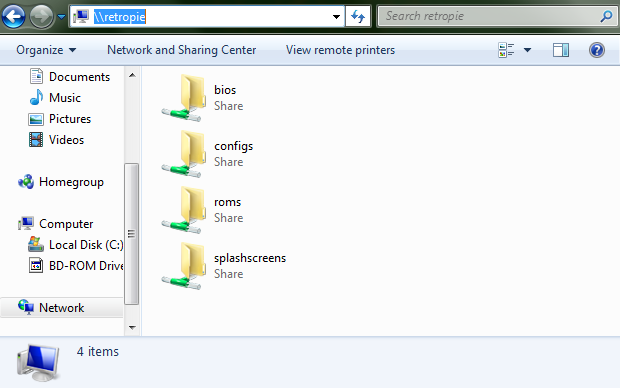
- if on MAC OS X open finder, select "Go" menu and "Connect to Server". Type smb://retropie and hit "Connect".
PLAY!
After you've added your roms you need to restart emulationstation in order for them to show up. You can restart emulationstation from the start menu, or by rebooting your pi with sudo reboot.
- see the rest of the wiki for more detailed information on individual emulators, advanced settings etc. If you still can't figure it out, the RetroPie community is very helpful on the forum.
- The RetroPie Project is primarily maintained by a few developers who develop the project in their free time. If you have found the RetroPie project useful please consider donating to the project here. As you become more familiar with RetroPie, pay it forward by helping others on the forum. The RetroPie Project is what it is today because of the many contributions of the community.
THANK YOU!
ㅡㅡㅡㅡㅡㅡㅡㅡㅡㅡㅡㅡㅡㅡㅡㅡ
ㅡㅡㅡㅡㅡㅡㅡㅡㅡㅡㅡㅡㅡㅡㅡㅡ
ㅡㅡㅡㅡㅡㅡㅡㅡㅡㅡㅡㅡㅡㅡㅡㅡ
ㅡㅡㅡㅡㅡㅡㅡㅡㅡㅡㅡㅡㅡㅡㅡㅡ
ㅡㅡㅡㅡㅡㅡㅡㅡㅡㅡㅡㅡㅡㅡㅡㅡ
'interest 2 > 라즈베리파이·게임설치사용' 카테고리의 다른 글
| [라즈베리파이] [라즈조이박스] 소프트웨어 설정하기 - RetroPie 3-3-1 소프트웨어 세팅 (0) | 2021.10.14 |
|---|---|
| [라즈베리파이] 레트로파이 - RetroPie-Setup ... Configuring Wifi (0) | 2021.10.14 |
| [라즈베리파이] 레트로파이 - 영어 First Installation (0) | 2021.10.14 |
| [라즈베리파이] 레트로파이 조이스틱 조이패드 듀얼쇼크 엑스박스패드 세팅 (0) | 2021.10.14 |
| [라즈베리파이] 레트로파이 (라즈베리파이3) 무선 와이파이 잡기 (WIFI) (0) | 2021.10.14 |


댓글